In-game menu
IN-GAME MENU OPTIONS
- Video tutorial:
IMPORTANT!
The attached video instruction duplicates the points of this text instruction
1. Menu on the left side.
1.1. Let's start our review of the in-game menu options with the block of buttons on the left side of the screen. The menu consists of the following options:
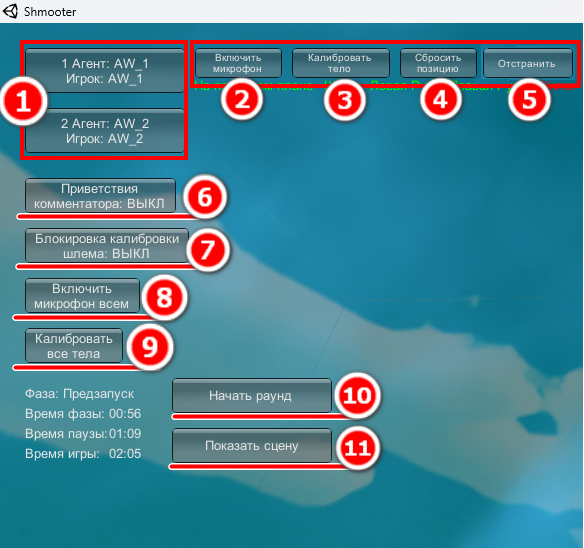
1.2. List of connected headsets (1).
-
The list on the left will display the headsets that have successfully connected to the game.
-
In this example, we see two connected headsets in the list.
1.3. If you click on a player's name in the list on the left, individual options will open for them.
1.4. Turn on the microphone (2).
-
The option allows you to turn on or off the microphone for the selected player. The microphone is used for in-game chat between players.
1.5. Calibrate the body (3).
-
This option allows you to calibrate the height of an individual player at any time during the game.
1.6. Reset position (4).
IMPORTANT!
The position reset option is used extremely rarely.
It allows you to return the player to the correct position in the virtual space.
This option is used in cases where the headset calibration does not work correctly and does not return the player to the correct position.
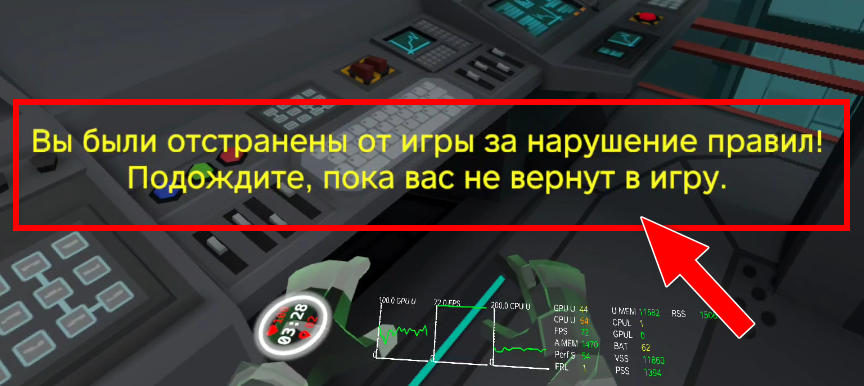
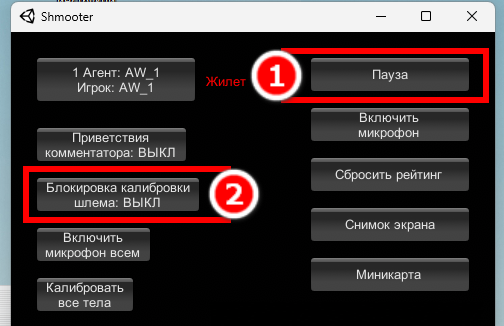
1.7. Suspend (5).
-
The option is used to punish players who break the rules.
-
When you press the Suspend button, the player's weapon is disabled
-
Also, while the player is suspended, they will not be able to use elevators and portals.
-
Inside the headset, the player will see the following warning:
-
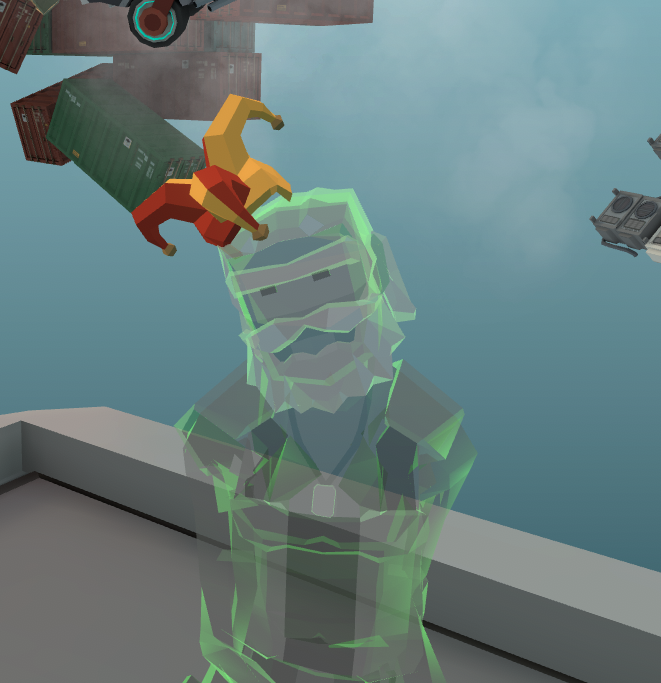
The suspended player's avatar will be highlighted in green and will have a jester's cap on their head:
1.8. Disabling Commenter greetings (6).
-
This option allows you to turn off the in-game announcer and greatly shorten the initial greetings, which allows you to start the game faster.
-
This option is especially relevant when starting repeat rounds.
1.9. Blocking accidental headset calibration during gameplay (7).
-
This option locks the A and X buttons on the controllers after the game is unpaused and the active phase of the game begins.
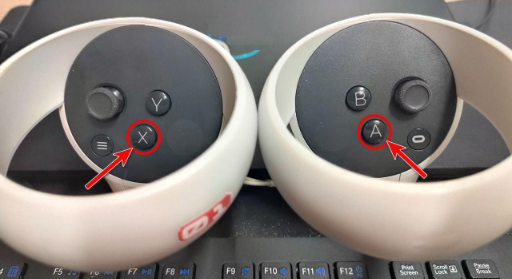
- The option prevents accidental recalibration of the headsets during gameplay when players accidentally press the A or X buttons on the controllers.

IMPORTANT!
The lock prevents the headsets from being calibrated until:
- The game will not be paused (1)
- Or the option will not be disabled manually in the game window (2)
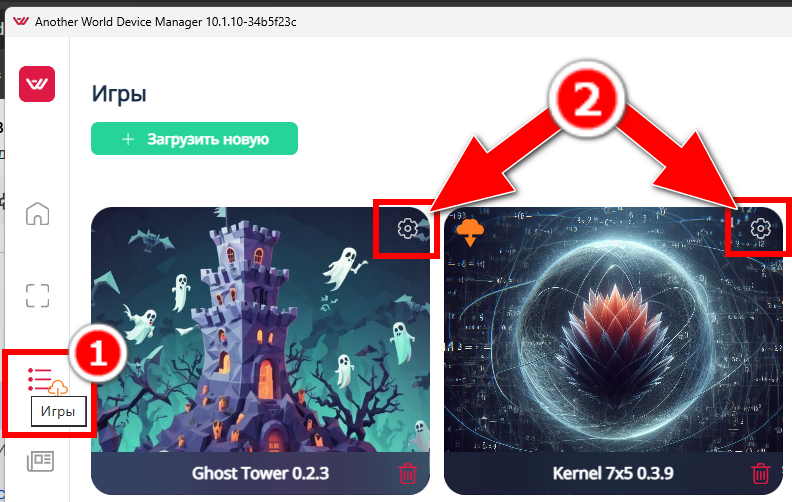
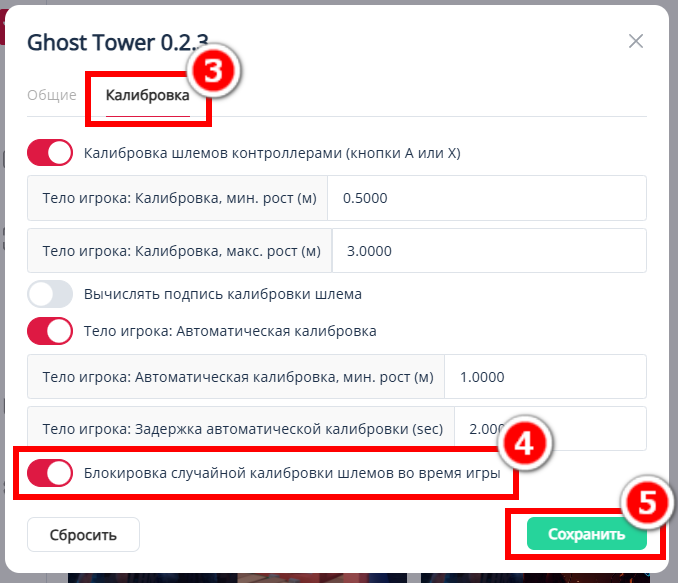
NOTE:
To display the option in the in-game menu, you must separately enable the Lock option in the Games tab (1) → Settings of the desired game (2) → Calibration tab (3) → Enable the Prevent accidental self calibration option (4) → Save changes (5)
1.10. Turn on the microphone for everyone (8).
- This option allows you to enable voice chat for all players at once.
- By default, when you launch games, voice chat will always be disabled, and if necessary, it can be activated using this button.
NOTE:
If you don't use voice chat at all, you can disable it in the game settings.
This can be done as follows:
Go to the Games tab → Shmooter game settings → uncheck the Voice chat option.

1.11. Calibrate all bodies (9).
-
This option allows you to calibrate the height of all players at the same time.
-
It is usually used to adjust the height of players after the headset calibration.
1.12. Start round (10).
IMPORTANT!
This option will be displayed in the menu only after all headsets have been calibrated!
- The option allows you to start the first and subsequent rounds for players.
1.13. Show scene (11).
IMPORTANT!
This option will be displayed in the menu only after all headsets have been calibrated!
- The option works as follows:
After switching the map, players initially see only each other and a blue background (1) instead of the virtual environment, as shown in the example:
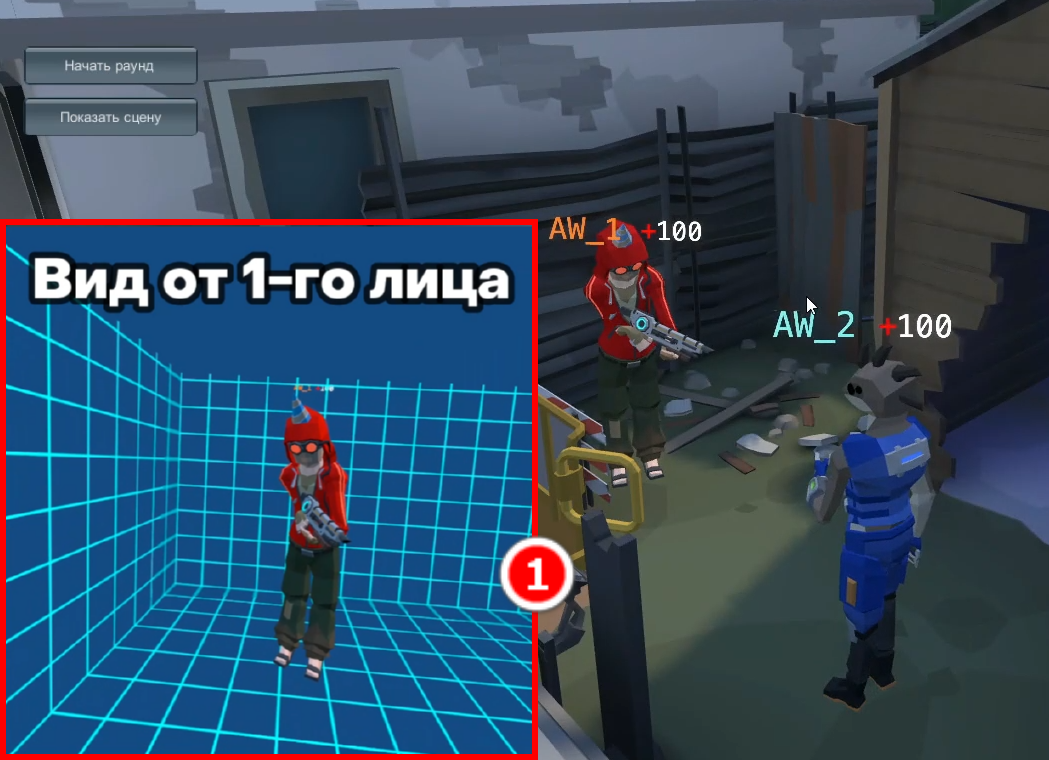
NOTE:
The blue background is added for safety purposes to prevent players from walking on the virtual location too early.
- Next, after pressing the Show scene button for players, the display of the virtual location is turned on (2)
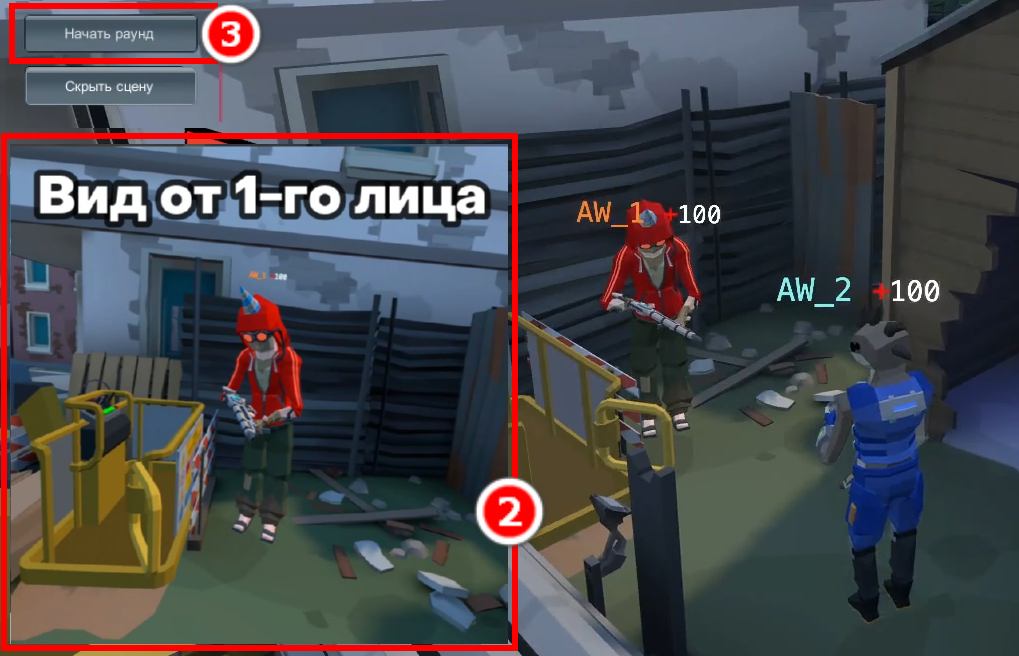
IMPORTANT!
When you click the Show Scene button , the round does not start!
At this stage, the players' weapons are blocked, but at the same time, the players can already explore the virtual environment!
NOTE:
The Show Scene option is typically used to introduce players to a new location!
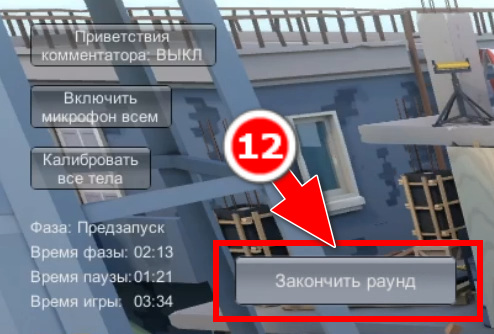
1.14. Finish the round (12).
-
After starting the game with the Start Round button, the option to end the round early will be available in the in-game window, which allows you to end the round at any time if necessary.
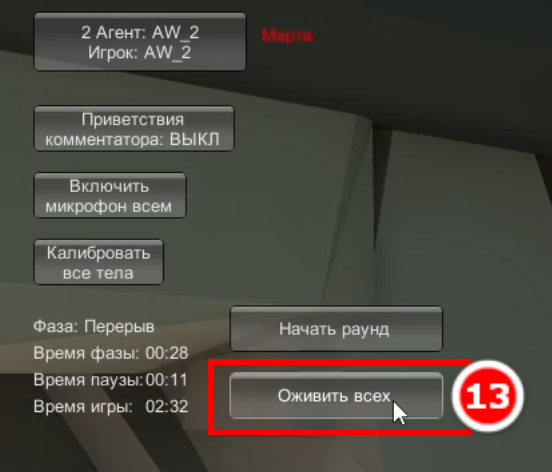
1.15. Revive everyone (13).
IMPORTANT!
The option will be available only after the completion of the next round in SHMOOTER!
- This option allows you to revive players after the end of a round, and similar to the Show Scene option, it is also used to instruct players when switching to a new map.
NOTE:
After the round is over, all players are automatically killed. Dead players, in turn, cannot interact with the virtual environment.
1.16. So, we have reviewed the options of the in-game menu on the left side of the game window.
-
Next, let's move on to looking at the menu in the middle of the game window.
2. Camera control menu.
2.1. The camera control menu is located in the middle of the screen at the top of the game window, and it looks like this:
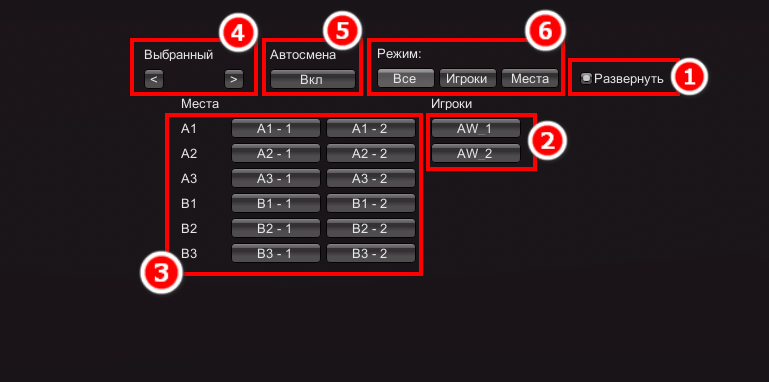
2.2. Expand (1).
-
The option allows you to expand the camera menu, which in turn will consist of several blocks of camera control buttons.
-
Allows you to manually switch to a selected angle with a view of a specific place in the game location.
-
Allows you to change camera angles one by one.
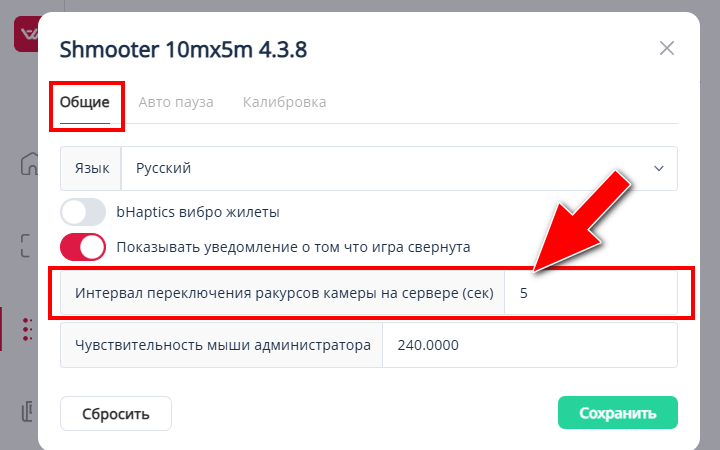
2.6. Auto change button block (5).
- Allows you to enable the automatic camera angle change mode.
- The default camera change interval is 5 seconds.
NOTE:
The interval duration can be changed in the game settings.
To set the interval, you need to:
Go to the Games Tab → SHMOOTER Game Settings → Change Camera Angle Switching Interval
2.7. Auto change mode buttons block (6).
-
Allows you to select the desired mode for auto-changing cameras.
The following modes are available: -
Angles from specific places on the location.
-
First person view.
-
Mixed option.
2.8. Third person view.
-
To switch to a 3rd person view, click on the player's name in the list on the left (1) → After which the camera will switch to the selected player in a 3rd person view (2)
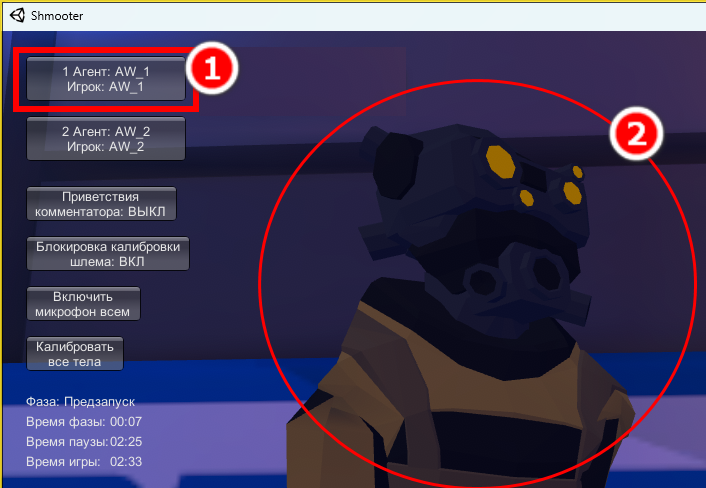
IMPORTANT!
Switching to a 1st or 3rd person view can be helpful in some cases to resolve issues.
For example, to understand in what part of the virtual location the player is, or what the player sees inside the headset.
2.9. So we've covered the camera control options.
-
Next, let's move on to looking at the menu on the right side of the game window!
3. Menu in the upper right corner.
3.1. The menu in the right corner looks like this:
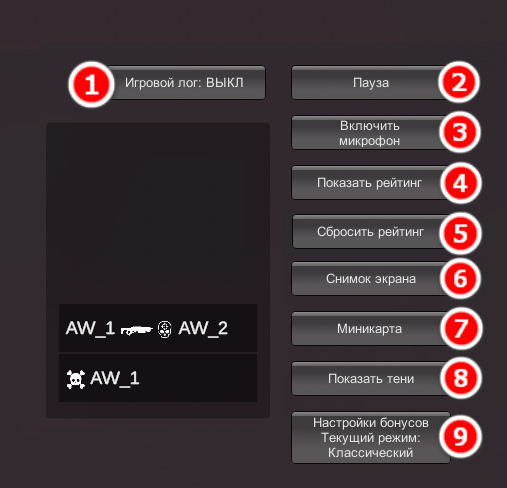
3.2. Game Log (1).
-
This option allows you to enable or disable the display of the Game Event Log:
3.3. Pause/Play Button (2)
-
The option allows you to pause the game and unpause the game at the required moment.
3.4. Turn on Microphone (3).
- The next option is to Enable and Disable the server microphone:
- The server microphone is used to communicate between the Operator and the Players, and is most often used to announce the results of the game, or to make a remark to one of the players.
NOTE:
When starting the game, the Server Microphone is always disabled!
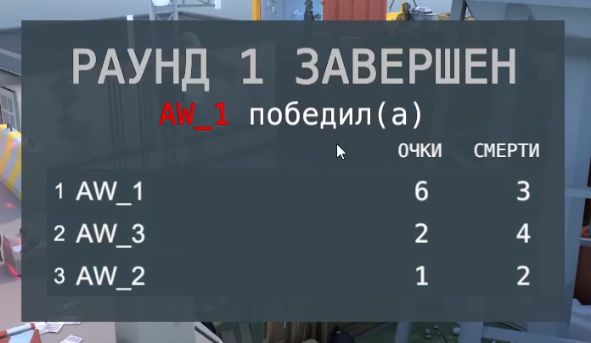
3.5. Show Leaderboard (4).
-
This option allows you to enable the display of game statistics on the game server screen.
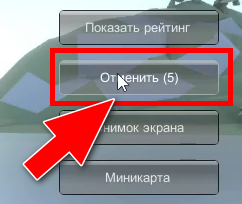
3.6. Reset Leaderboard (5).
- This option allows you to completely clear the current game statistics.
NOTE:
When you press this button, the action can be cancelled within 5 seconds, for example if the button was pressed accidentally.
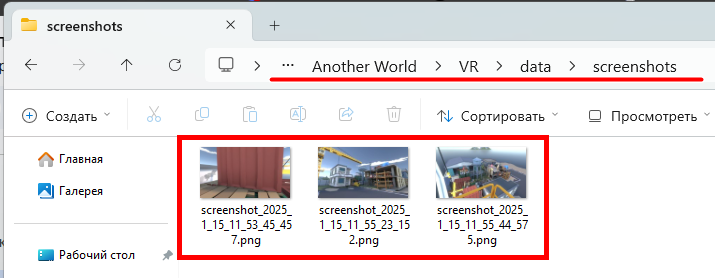
3.7. Screenshot (6).
- It allows you to save game screenshots in high quality.
NOTE:
After pressing the screenshot button, the game on the server may freeze for a few seconds - this is a normal behavior.
- Screenshots of the game can be found in the following folder:
C:\Another World\VR\data\screenshots
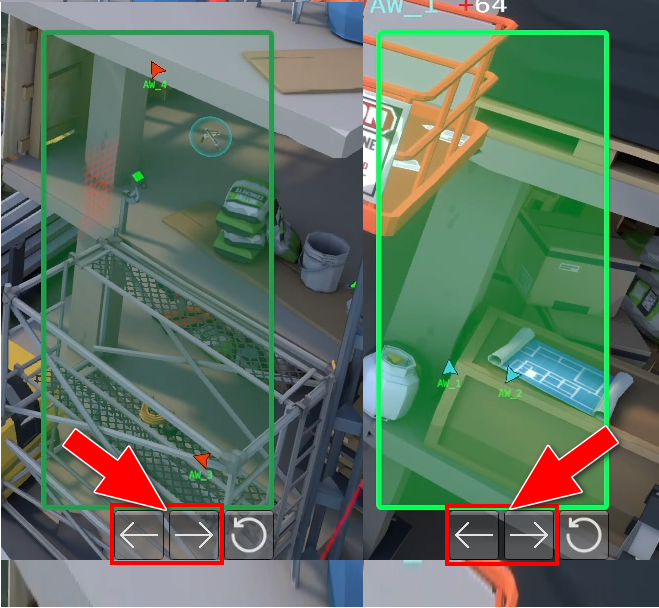
3.8. Minimap (7).
-
This option enables displaying the minimap in the game window.
-
The minimap is designed to track the position of players and to recognize miscalibrated headsets.

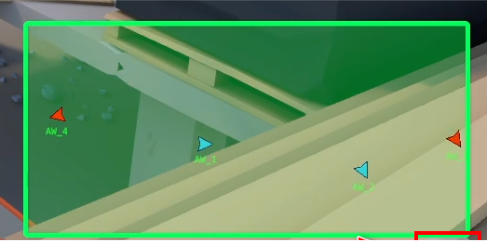
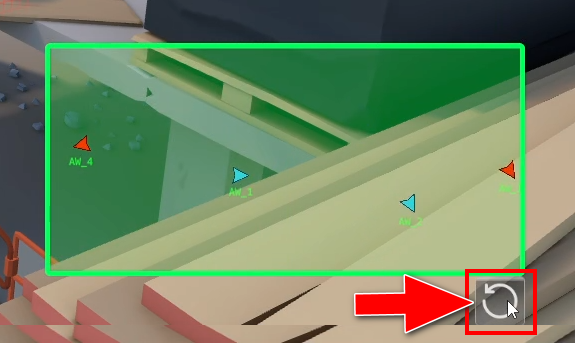
NOTE:
In the game window there is an option to rotate the Mini Map for a more convenient location of the map on the screen.
NOTE:
Also, if the game is launched on several play areas, buttons for changing the position of the minimaps relative to each other will be available in the menu.
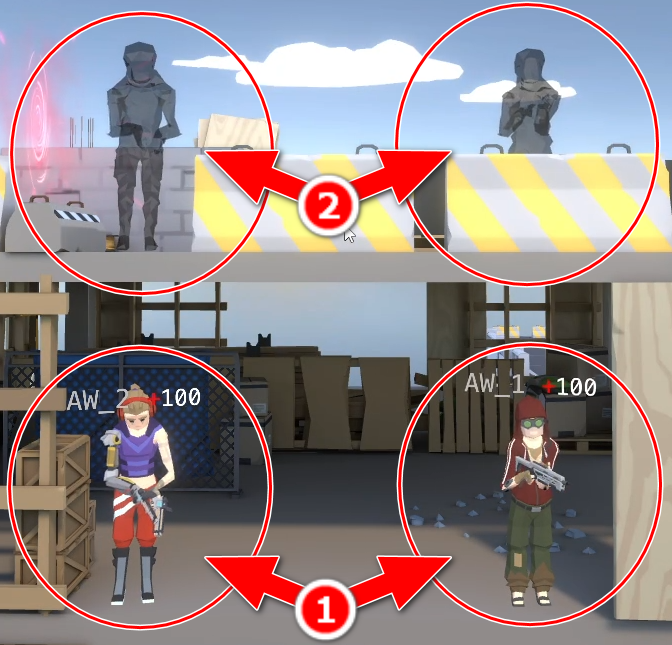
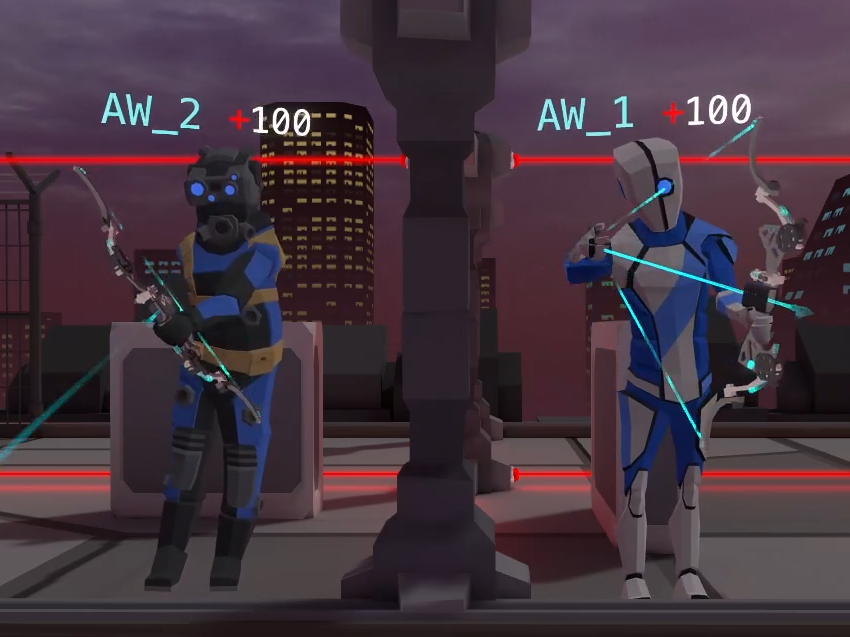
3.9. Hide Shadows (8).
- This option Enables and Disables the display of player shadows on the server.
- In the game, shadows represent the physical position of the players when the players are on different floors of the virtual location.
NOTE:
The position of the Players (1) is completely duplicated by the position of the Shadows (2) as shown in this example:
NOTE:
By default, when you start the game, player shadows are always disabled!
NOTE:
- The Hide Shadows option disables the display of shadows only on the server!
- Inside the headsets, in turn, the shadows do not disappear!
IMPORTANT!
The shadow display option is useful for tracking player positions, and is usually used as a supplement to the minimap. This will make the players' relative positions more visible.
3.10. Bonus modes (9).
-
The option allows you to switch between bonus modes
-
There are currently two modes available:
-
Classic mode.
-
Fixed weapon mode.
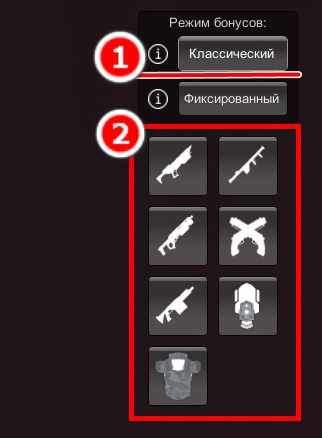
3.10.1. Classic mode (1).
-
In this mode, you can selectively disable any bonus from the list (2).
- In this mode, players can pick up various bonuses that will be located in fixed places on the game location.
NOTE:
When you turn the bonus off and on, the bonus will immediately appear on the location. This feature can be used in some game situations.
3.10.2. Fixed weapon mode (2).
-
This mode allows you to select one fixed weapon from the list (3) for all players.
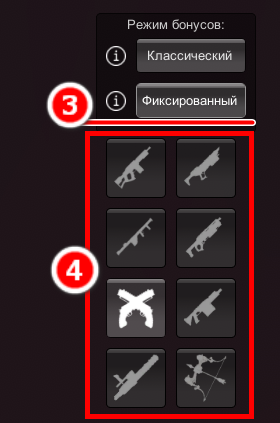
- For example, you can choose for all players to have only grenade launchers, or make it so that there are only bows
IMPORTANT!
The ability to change the bonus mode during the game will depend on the choice of Ranked or Unranked game!
- For Unranked game:
You can change bonus modes and weapons at any time during the game!
- For Ranked game:
Changing modes and weapons is only possible between rounds!
4. In-game options in other games.
4.1. For other games the menu appearance and number of options will be different!
NOTE:
The operation of the above options will be the same!
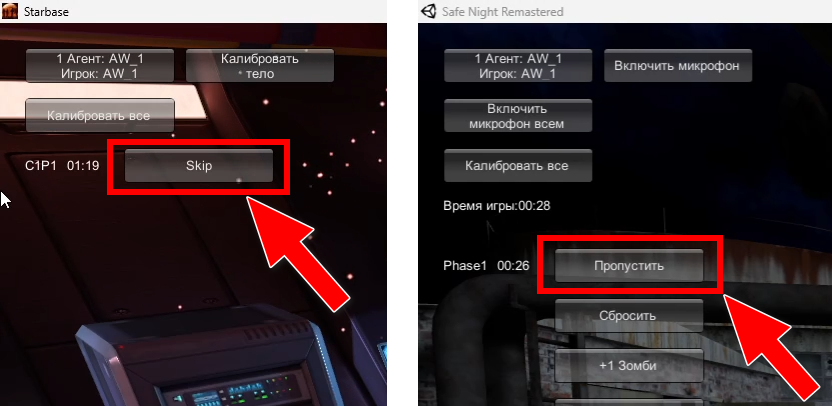
4.2. For STARBASE and SAFE NIGHT games, a Skip option will be available.
-
The option allows you to skip the current game phase if necessary.
-
This option will also be useful if problems arise, for example when a game phase has not worked correctly and it cannot be continued in the usual way.
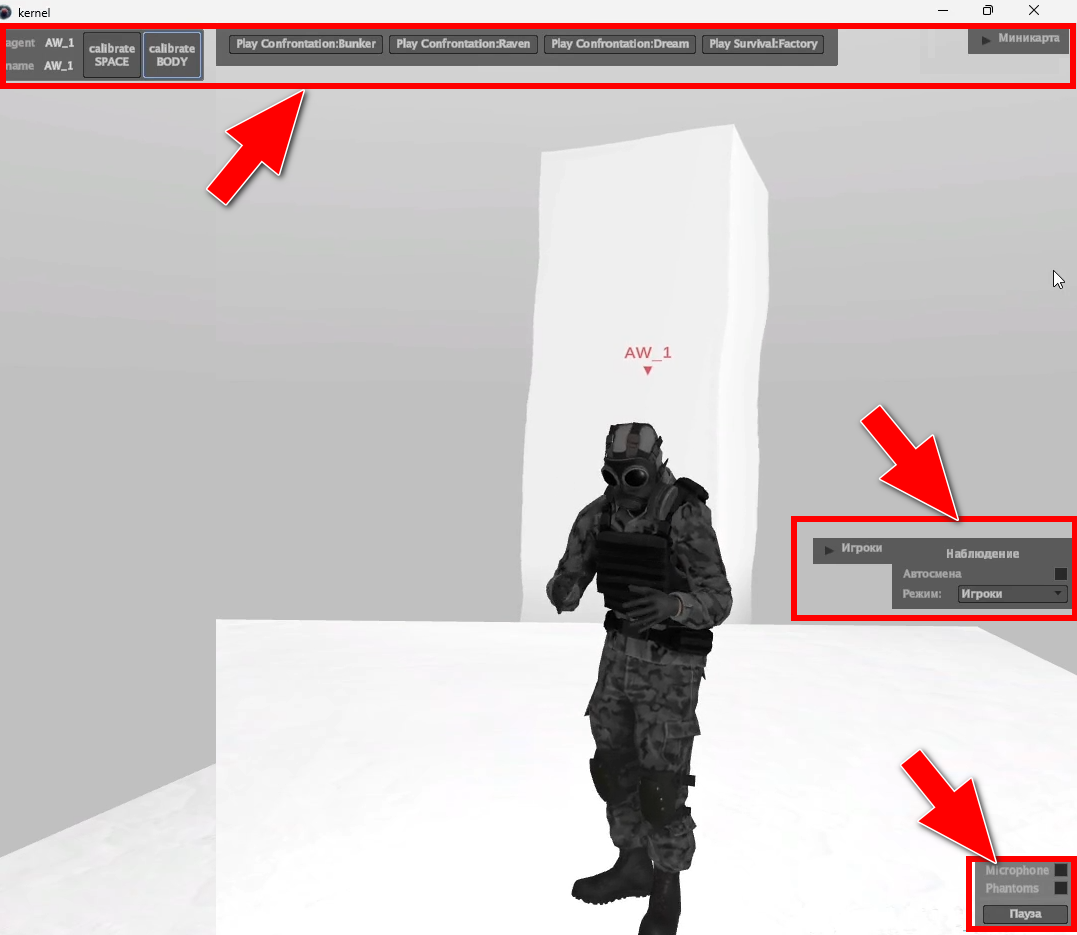
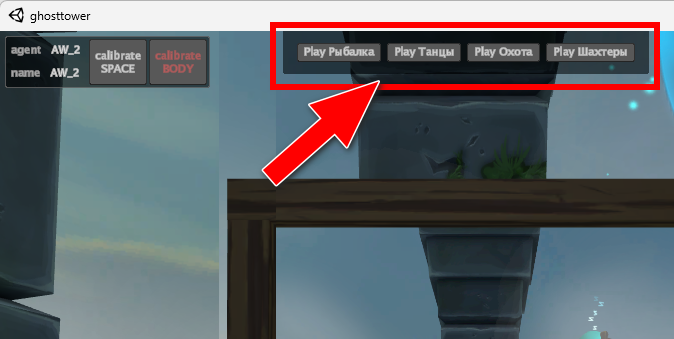
4.3. For the games KERNEL, GHOST TOWER, and STARBASE, switching between maps will be possible via the menu at the top of the game window.
4.4. This concludes our review of in-game options!
— — —
IMPORTANT!
If you have any questions, feel free to contact us in the tech chat in Discord for help!